
Shopware6
In this section we will explain the steps needed to connect your account to Shopware.
Information
| Summary | |
|---|---|
| Available payment methods | All (online & offline) |
| Name | Shopware6 | e-Commerce platform | Plugin |
| Download location | Pay. GitHub or Shopware Store |
| Refunds | Via Shopware backoffice or My.pay |
| Multi-store | Yes |
| Instore | Yes |
| Payment filters | Min/max amount | country | B2B/B2C | product based and more... |
| New payment options | Update required |
| Requirements | Shopware 6.4 or higher |
| Installation | Shopware Store or GitHub |
| Features | Payment Based Checkout for iDEAL and PayPal |
Set-up
Installation
You can easily install the plugin via Shopware's plugin manager. Have your credentials ready.
- In the Shopware 6 Admin panel, navigate to Extensions > Store and type "Pay." in the search bar.
- Select the plugin by clicking on the image and then Add extension
- The plugin should now be visible under Extensions > My extensions
- Toggle the slider from Deactivated to Activated by clicking it
It is automatically set to deactivated
Install via GitHub
1. Download the latest release from GitHub
Make sure to download PaynlPaymentShopware6-vx.x.x.zip and not the source code
2. Navigate to Extensions > My extensions and select Upload extension at the top right hand corner
3. Select the ZIP file you have just downloaded and select Upload
4. The plugin should now be visible under Extensions > My extensions
5. Toggle the slider from Deactivated to Activated by clicking it
It is automatically set to deactivated
Install via Shopware store
1. Go to Pay. payment gateway for Shopware 6 ✓ in the Shopware store
2. Click Add to shopping cart and then Proceed to checkout and login with the details of your webshop to which you want to add this plugin
3. When signed in, select Complete payment to download the plugin for free
4. The plugin should now be visible under Extensions > My extensions
5. Toggle the slider from Deactivated to Activated by clicking it
It is automatically set to deactivated
Configuration
After the installation is complete, start accepting payments by doing the following. Have your credentials ready.
- In the Shopware 6 Admin panel, open the plugin via:
Settings > Extensions > Pay. payments
or
Extensions > My Extensions > ... > Configure - Fill in the following details:
- Token-Code (AT-xxxx-xxxx)
- API-token (a3e314ee...)
- Service-ID ((SL-xxxx-xxxx))
- Select Install payment methods to load all payment methods activated in your sales location
- Configure your plugin and click the Save button to save your changes
Additional plugin settings
Test mode
When activated, all transactions will start in sandbox (test) mode.
Use a uniform payment method by Pay.
Enable this option to use Pay's Hosted Payment Page. Your customer will see 1 payment option in the checkout, which redirects to our hosted payment page. This can be useful for kiosk mode.
This page uses filters to optimise payment methods shown (like countries and minimal amount for some Buy Now Pay Later methods).
CoC number required
Make this field a mandatory field to complete, for example for B2B orders.
Allow refunds
Enable this option to process refunds via Shopware's backend.
Use styles by Pay.
Select whether you want the default plugin style applied to your checkout. Logo will be shown to the right and names to the left. You can leave this option disabled if you want to use a custom template or overwrite the styling.
Payment methods description
Show payment method info - always show payment method description in a "tooltip".
Do not show payment method info - never show payment method description.
Show only on desktop - only show tooltip info on desktop.
Use additional address fields
You can use a third address field, when address fields 1 and 2 do not suffice (for example with B2B orders). Please also check Additional customer fields _chapter under Features.
Female salutations
Redundant. Use Shopware's own settings via Settings > Salutations.
Payment screen language
Opens payment pages in a certain language, based on:
Specific language - select a language from the dropdown to always open payment pages in this language.
Shopware language - opens any payment page in the storefront language, as set by the enduser in Shopware storefront.
Browser language - opens any payment page in the language set in the browser of the enduser.
IP Settings
Choose which ip-address is provided to the payment method
Default (SDK function) - The standard as used in our SDK. Usually this is the best option.
HTTP forwarded - This may be necessary if a payment method indicates that it always receives the same IP address.
Remote address - In other cases this can be the solution if a payment method indicates that it always receives the same IP address.
Order State Automation
Here you can set which Shopware status should be linked to a certain transaction status to make sure the plugin works well with other external systems. Also refer to the feature: Order State Automation.
PIN payment
Here you can connect a card terminal to your webshop.
Choose in checkout - enduser can select a card terminal in the checkout via a dropdown menu
Choose in checkout and save - card payments always start on the same card terminal (customer cannot change this). Also refer to the feature: Connect a card terminal.
Default payment method
You can set a default payment method for a sales channel. Select the Sales Channel and then set your preference in the dropdown "Default payment method". This setting resets itself after you reload your payment methods.
Payment methods
If you are unable to enable a payment method or it is not showing, please check it is enabled and fully boarded in your sales location. Certain payment methods, like credit cards, may take longer before activated.
You have now successfully connected your Pay. account to Shopware
Releases
Features
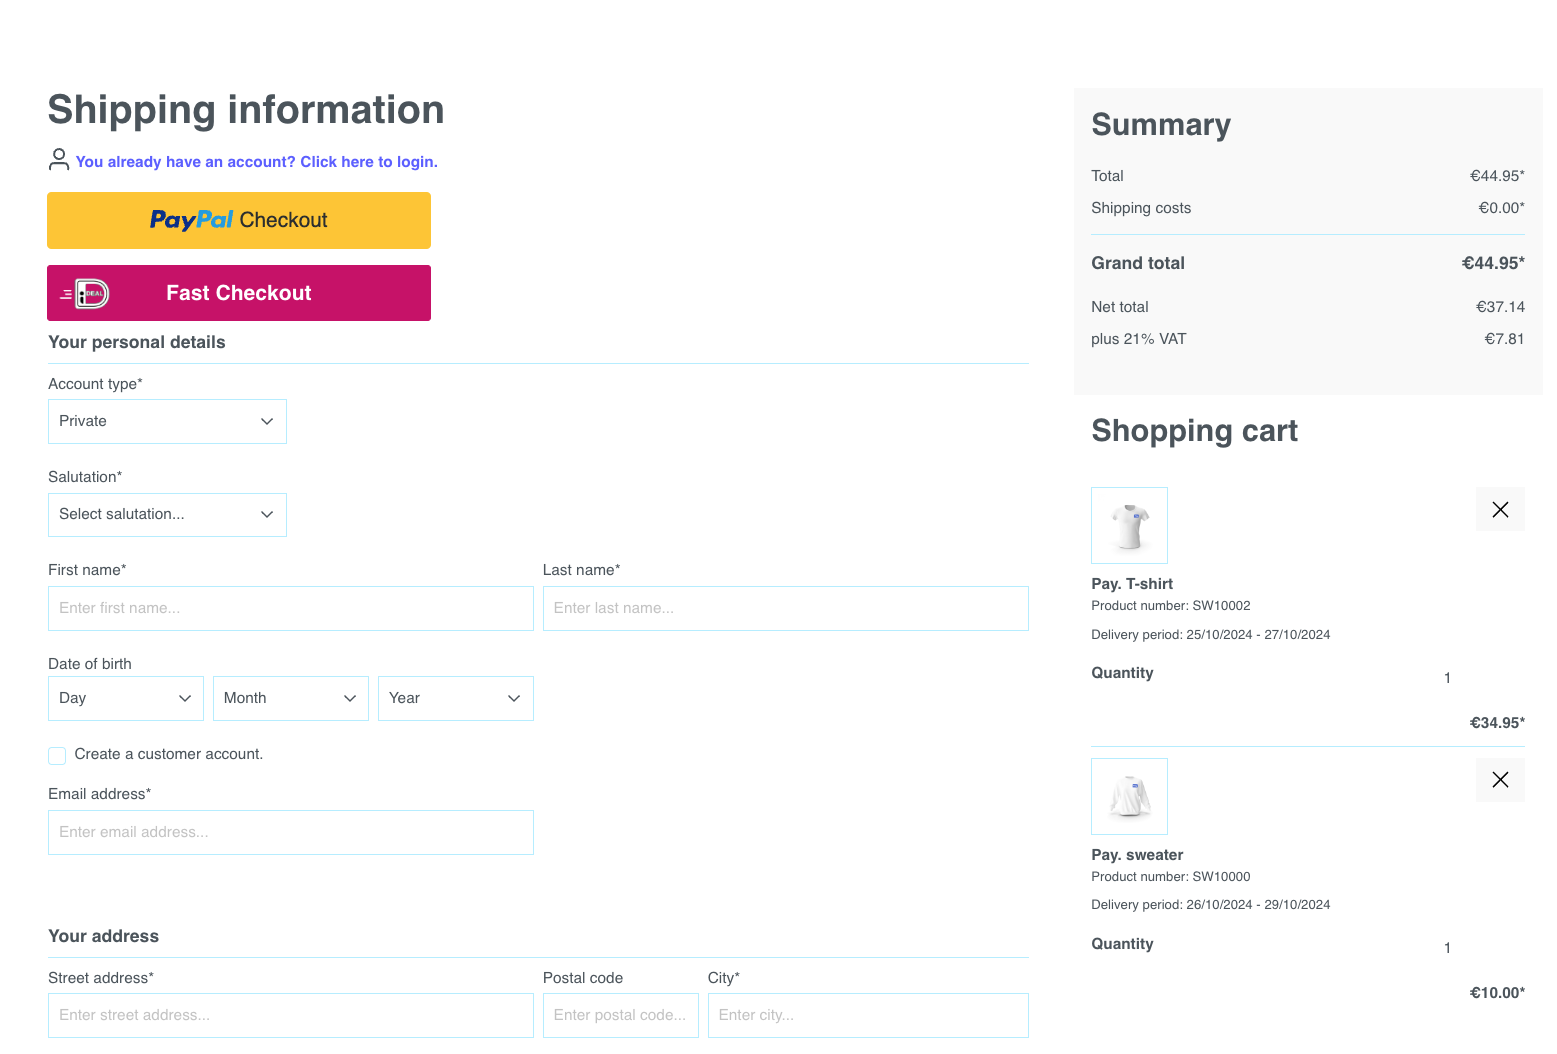
iDEAL Fast Checkout
In order to use iDEAL Fast Checkout, please install the latest version of our Shopware plugin.
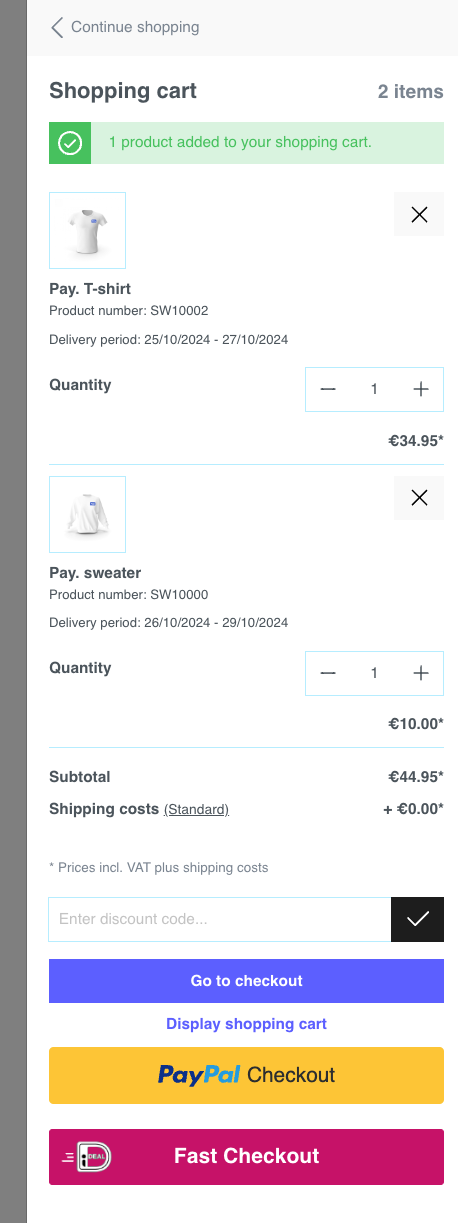
This feature will show a Fast Checkout button for iDEAL on the cart page and/or minicart.
To activate this:
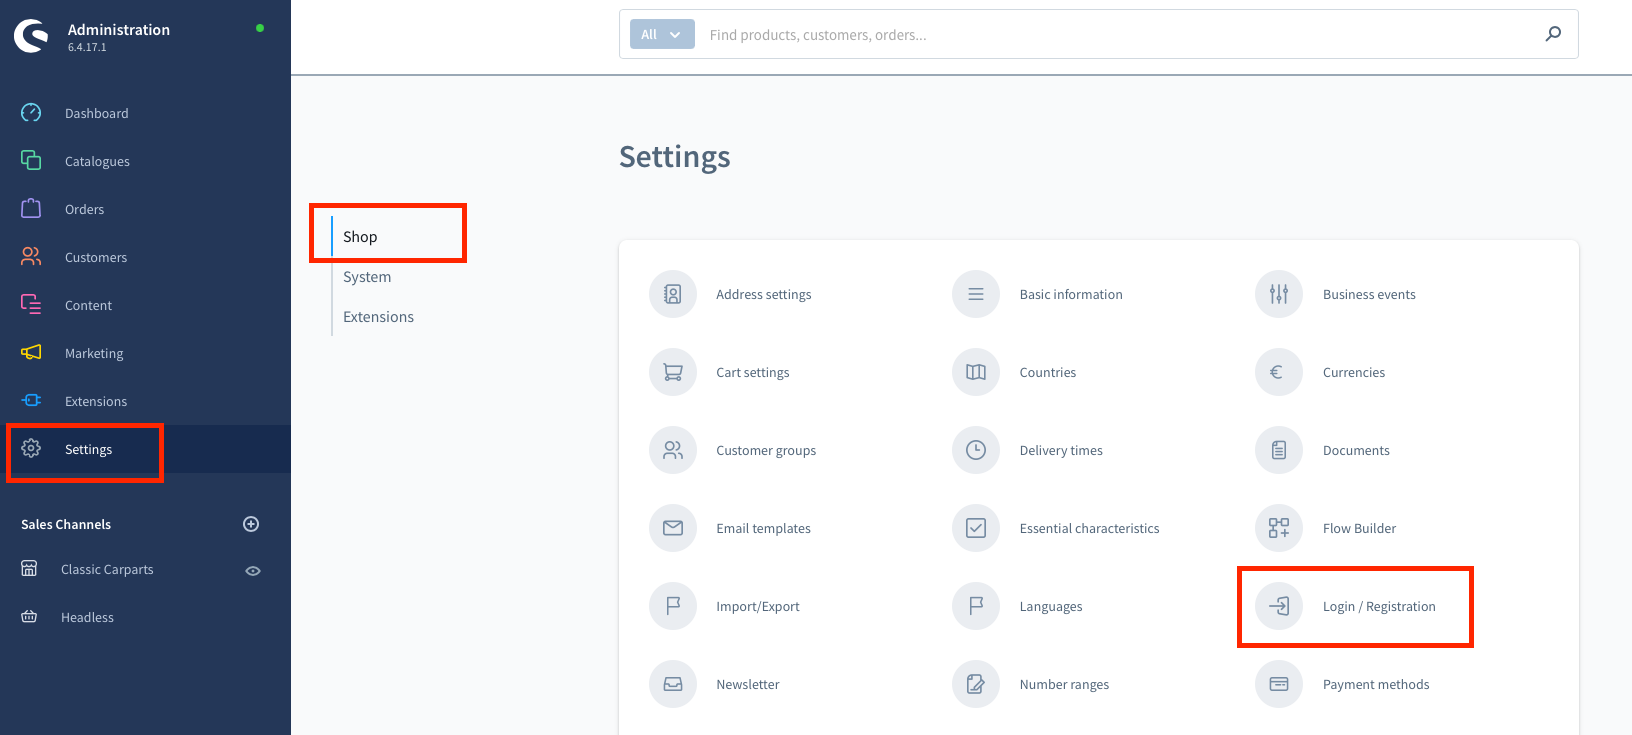
- Go to Settings > Shop > Payment Methods > iDEAL | Pay. payments
- Enable Cart page and/or Minicart by clicking on the toggle, depending on where you want the button to be displayed
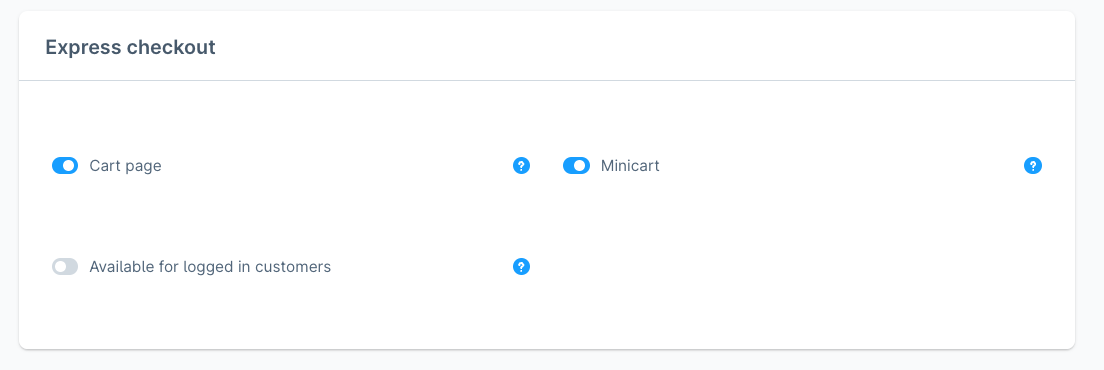
- Cart page
- Minicart
- Save your changes by selecting Save
PayPal Checkout
In order to use PayPal Checkout, please install the latest version of our Shopware plugin.
This feature will show a Fast Checkout button for PayPal on the cart page and/or minicart.
To activate this:
- Go to Settings > Shop > Payment Methods > PayPal | Pay. payments
- Enable Cart page and/or Minicart by clicking on the toggle, depending on where you want the button to be displayed and enter your PayPal credentials
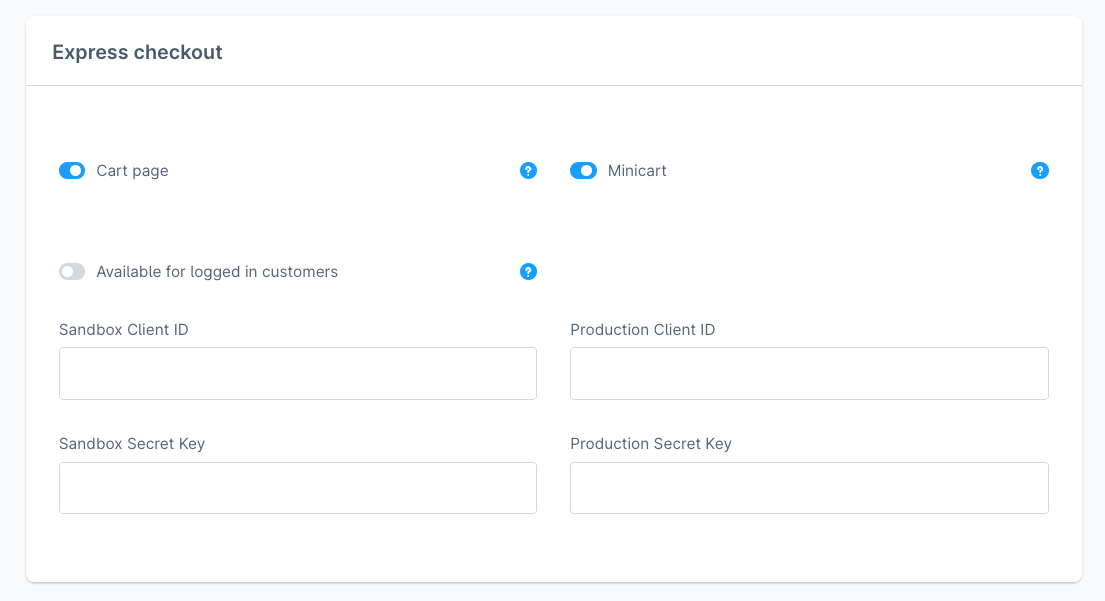
- Cart page
- Minicart
- Save your changes by selecting Save
Refunds
It is possible to create refunds directly in the Shopware backoffice. Full and partial refunds can be added by entering an amount or using the product list. You will need to activate this option (Allow refunds) in the plugin.
- In the Shopware 6 Admin panel navigate to Orders > Overview
- Click on the three dots
** ...**to the right of the order you want to refund - The Refund Payment Page will open. You now have various options to process your refund:
- Refund
- Amount to refund: €39,95
This amount is automatically filled with the total order amount, you can edit this amount for partial refunds. - Description: My first refund!
Description of the refund which you can use as a reference (this will not show in Pay.) - Product list
- Refund: via the dropdown, you can select the amount of products to refund on product level. The "Amount to refund" at the top is automatically adjusted
- Restock: check this box to revert the stock
- Shipping
- Allow shipping refund: when you select this checkbox, it is also possible to refund the shipping costs
- Click on Refund to refund the amount. You will receive a notification "Refund Successful" to let you know your refund has been processed correctly.
Capture (BNPL)
When you offer Buy Now Pay Later payment methods in your checkout, the idea is to invoice your customers after they have received their products or services.
Example:
customer places order > transaction status is AUTHORIZED > webshop ships the product(s) > CAPTURE is created
In this plugin, it is possible to automate this flow.
Under Extensions > My Extensions > ... > Configure you will see the Auto-capture settings.
Automatic Capture based on Shipment status: when enabled, the plugin will automatically send a capture (payment) notification to Pay. when the delivery status changes to 'shipped'. This applies to transactions in state AUTHORIZE.
Automatic Cancellation based on Order status: when activated, the plugin will automatically void a transaction in Pay. when the order status is changed to 'cancelled'. This applies to transactions in the state AUTHORIZE.
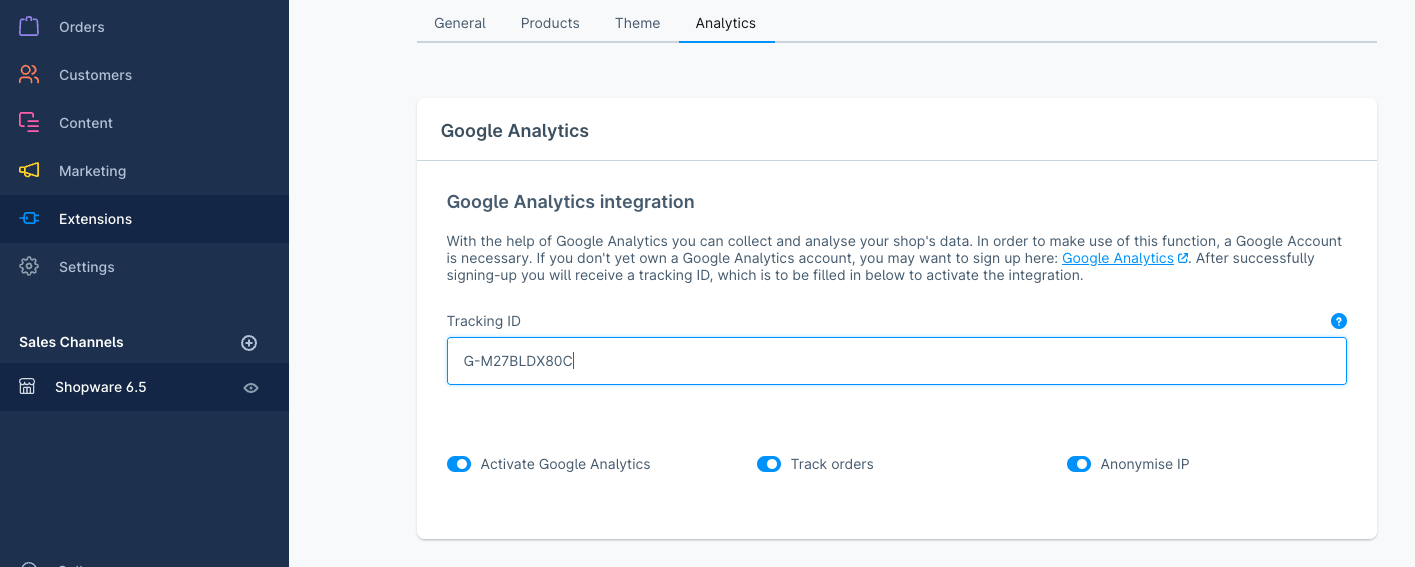
Google Analytics
Ensure you have activated the Google Analytics function in My Pay.
It is possible to connect your Google Analytics Account to Shopware 6. This setting in the Pay. plugin ensures the ga_Id is sent with the transaction to improve conversion tracking.
- Activate Google Analytics in Shopware via Sales Channel > Analytics and enter your tracking ID, also activate the toggle "Activate Google Analytics"
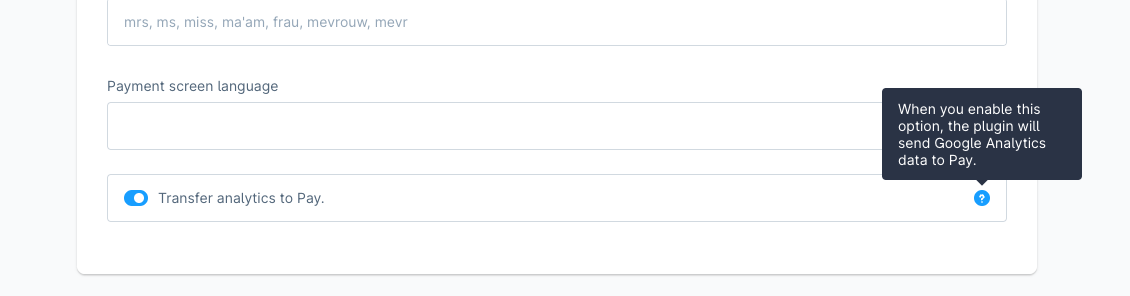
- Go to the Pay. plugin and activate the option Transfer analytics to Pay. by clicking the toggle
More information
At step 1; activate this option in Shopware
At step 2; activate this option in the Pay. plugin.
Paylink
To send payment links, the order will have to be created in the backoffice. A customer will not be able to select this payment option themselves in the checkout.
- In the Shopware 6 Admin panel navigate to Orders > Overview > Add Order
- Fill in all the customer and product details. Under the tab "Options", select the relevant payment method
- After completing all the information select Save Order
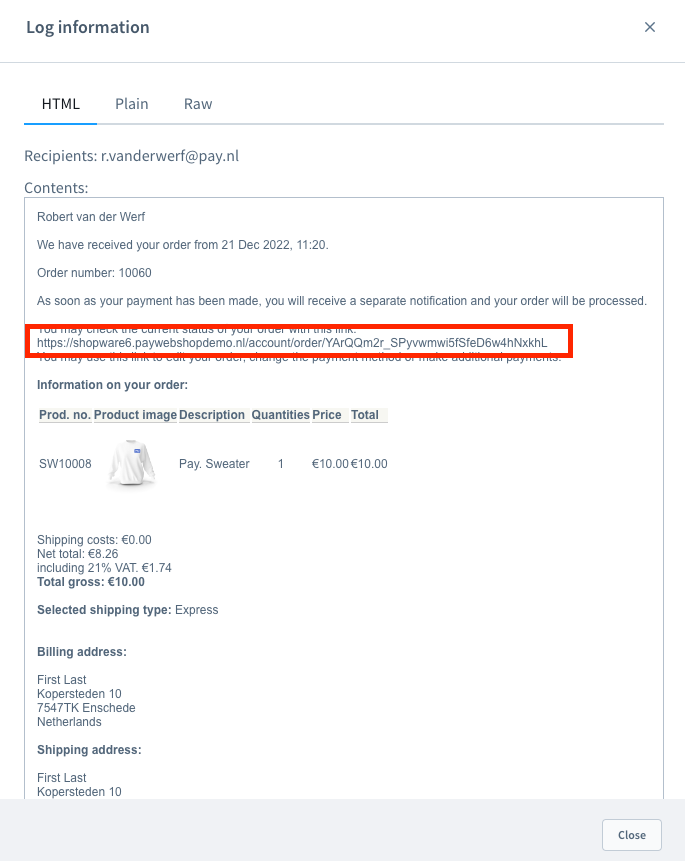
- Your customer will receive an email with a link to their order, see example below
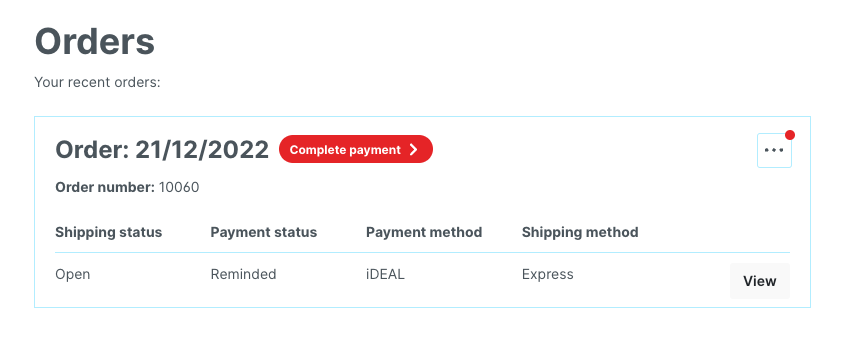
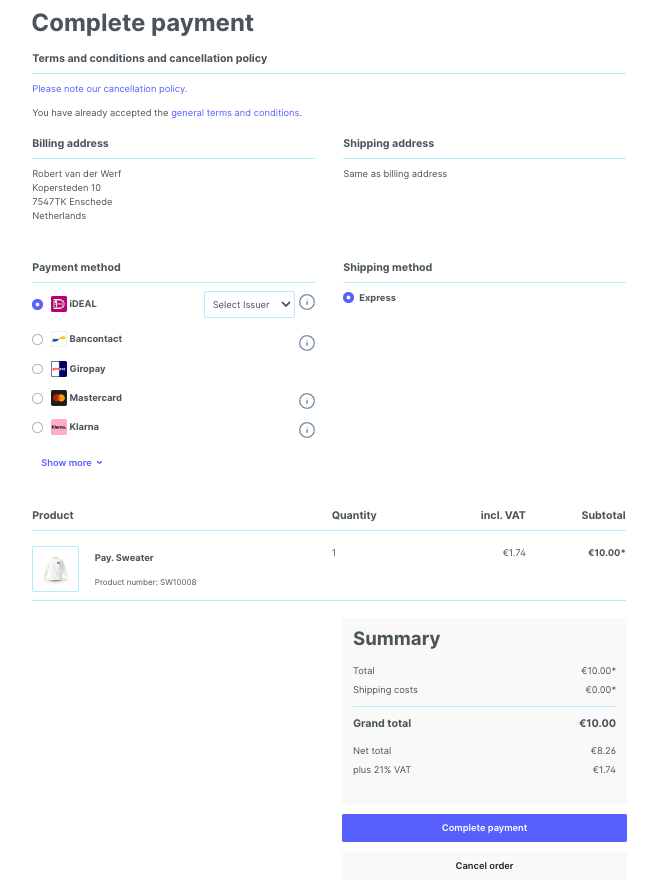
- The customer visits this link and can make a payment by selecting Complete payment
- The customer will be redirected to the "Checkout" to complete the payment as normal
Examples Paylink
Payment link is added to email in Shopware:
Customer will have the option to View their order and/or Complete payment:
Customer will end up on a regular checkout page to complete their payment for the order:
Instore
- Go to Stores > Configuration > Sales > Payment methods
- Search for Instore(PIN) and make sure Enabled is set to Yes
- Now go to the plugin via
Settings > Extensions > Pay. payments
or
Extensions > My Extensions > ... > Configure - Under PIN payment select either:
- Choose in checkout - enduser can select a card terminal themselves, via a dropdown menu in the checkout screen
- Choose in checkout and save - card payments always start on the same card terminal (customer cannot change this)
How to start instore transaction in checkout
1. Go to your webshop and add products to your cart
2. Continue the normal checkout process
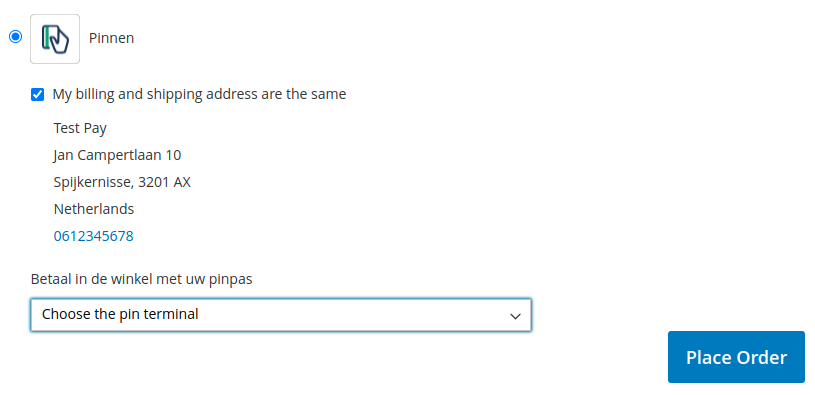
3. In the checkout, select payment option Pinnen
4. Select the card terminal you want to use for this transaction
5. Select Place Order
6. The customer is able to finish the transaction on the card terminal/
Surcharge
Please note that a GLOSSARY:SURCHARGE is not always allowed.
- In the Shopware 6 Admin panel, open the plugin via:
Settings > Extensions > Pay. payments
or
Extensions > My Extensions > ... > Configure - Activate Surcharge payment methods by clicking the toggle, this adds a new menu to the payment methods
- Go to Settings > Shop > Payment methods to apply surcharges on a payment method
- Type
- Absolute: fixed value. The value is set in the field "Amount".
- Percentage: percentage. The value is set in the field "Amount".
- Amount
- Fixed value: for €0,50 you enter 0.5.
NB: the amount includes VAT (this is automatically applied in the cart/checkout by Shopware using the default tax settings of the webshop). - Percentage: for 2% you enter 2.
- Surcharges not applied on orders totalling more than
- Surcharges will not be applied to orders totalling more than the amount entered. For example, you can enter 200 for €200.
Best practice
Be mindful of the following:
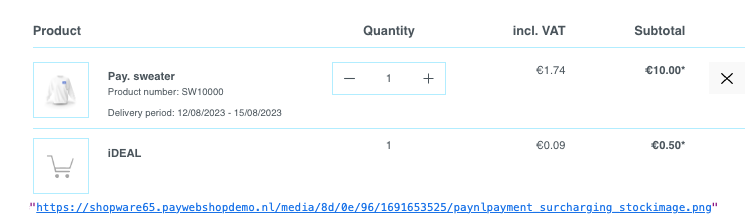
- The surcharges are added as a product line.
- Shopware remembers what payment method a customer has used. If this customers returns, and the last payment method included surcharges, these surcharges will be displayed in the cart as a product line (as long as the cart includes other products also).
- If your default payment method has surcharges, it will be shown in the cart as a product line (as long as the cart includes other products also). We advise to set a default payment method without surcharges.
Additional information and examples
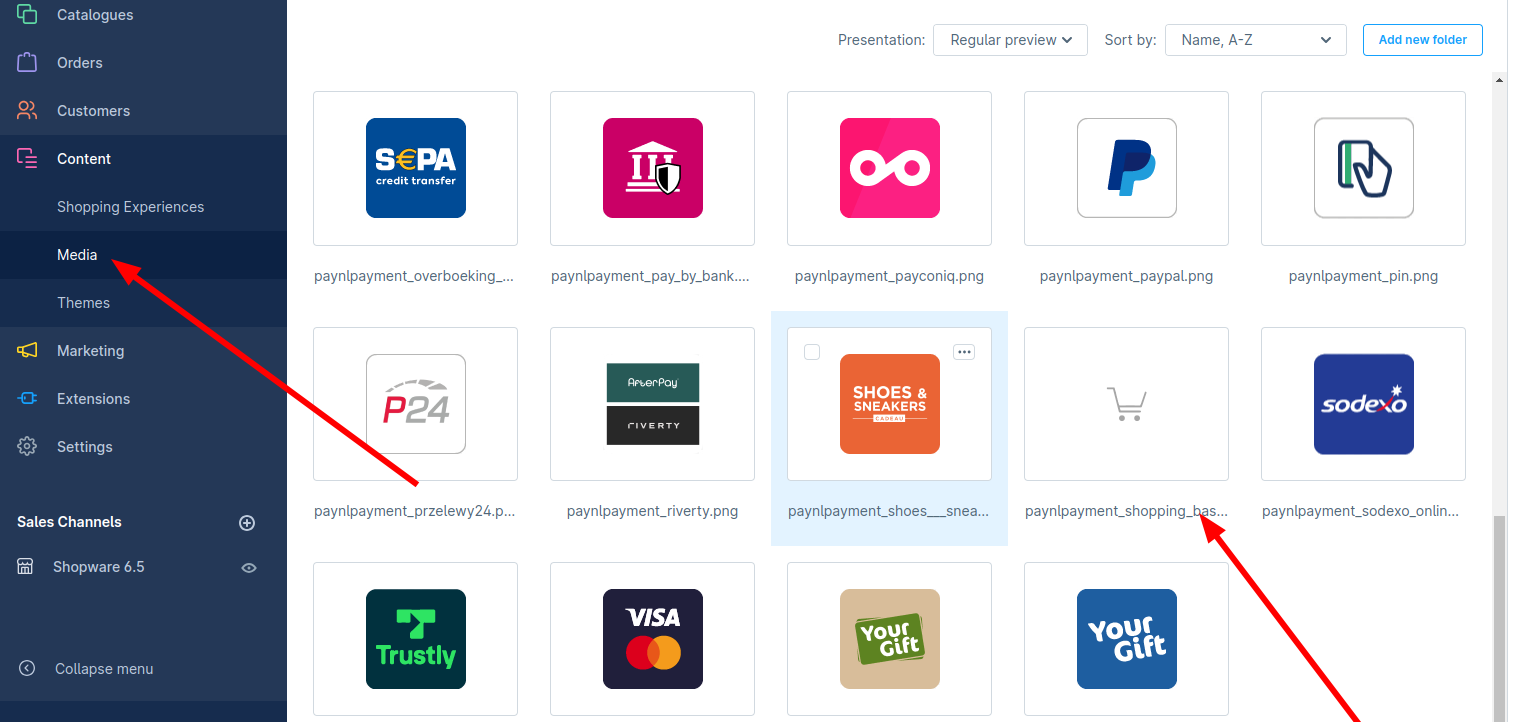
You can change the image of the shopping cart? Go to Media > and search for
paynlpayment_surcharging_stockimage.png. Delete this image and replace it with an image of your choice, the name should be exactly the same as the one that was deleted, and in PNG format.
Examples
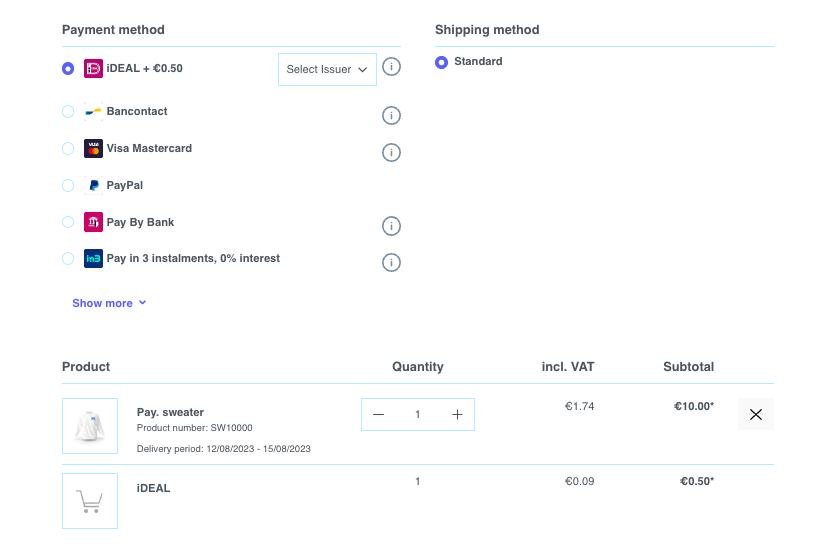
Surcharges as shown in checkout
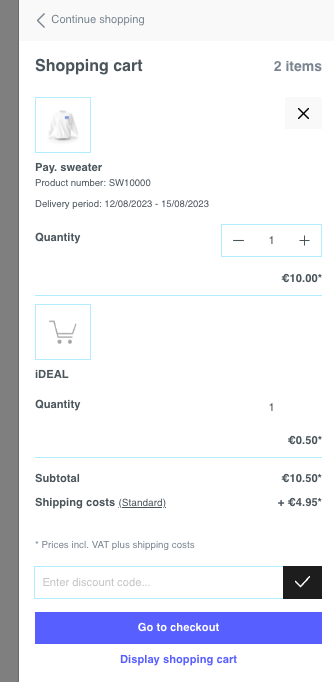
Surcharges as displayed in the cart
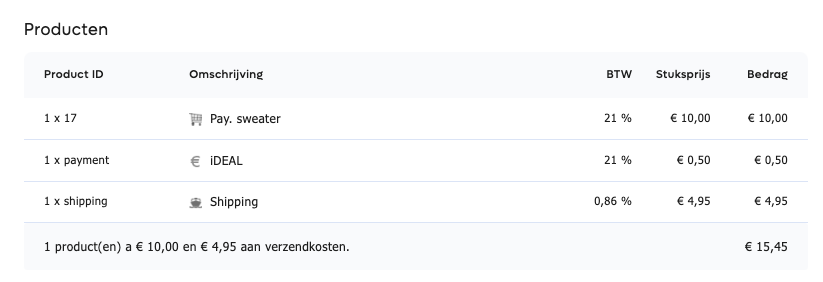
Surcharges as displayed in My.pay portal
Business Orders
Certain payment methods, like Biller, can only be used with B2B orders. For these payment methods, you can select:
Show payment method only for businesses
- In the Shopware 6 Admin panel, go to Settings > Shop > Payment methods
- Go to the relevant payment method and click Edit details
- Under Availability rule you will see a dropdown. Set this to Commercial only, for example to only show the payment method for commercial customers only
- Click Save to save your changes
Show COC and/or VAT field in checkout
- In the Shopware 6 Admin panel, open the plugin via:
Settings > Extensions > Pay. payments
or
Extensions > My Extensions > ... > Configure - Go to CoC number required and activate this option by selecting the toggle, to make this a required field
Additional information
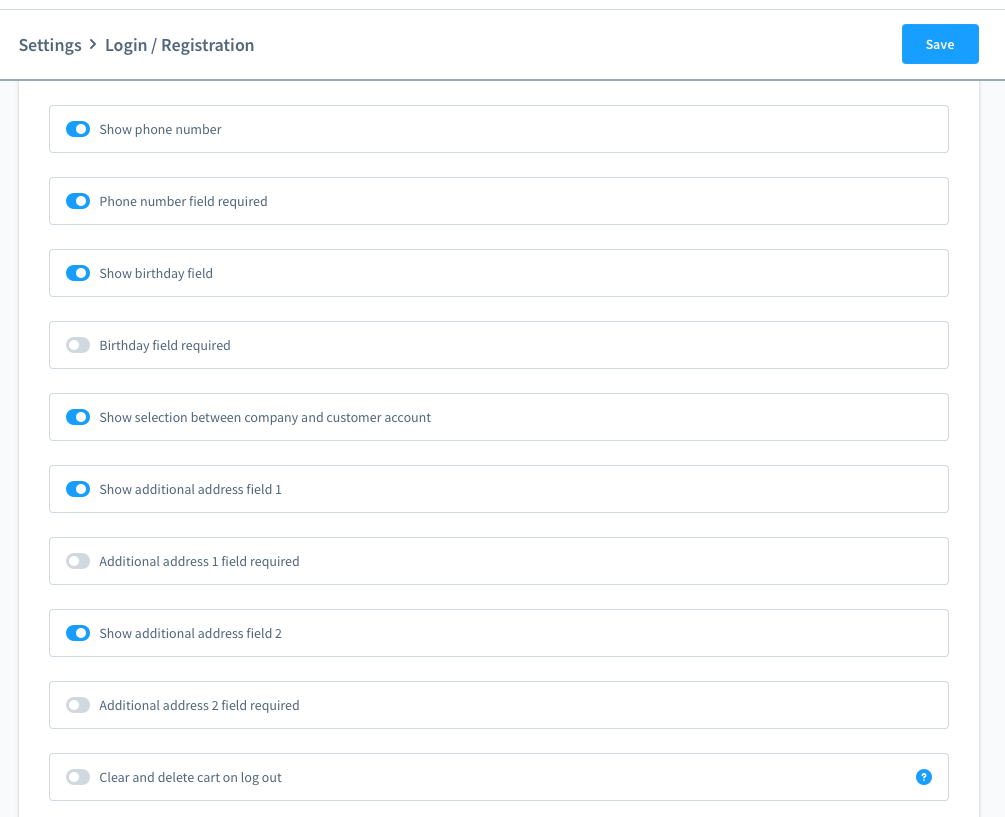
In the checkout, the payment method will only appear, when the customer has confirmed they are a commercial customer via the dropdown I am: Commercial/Private
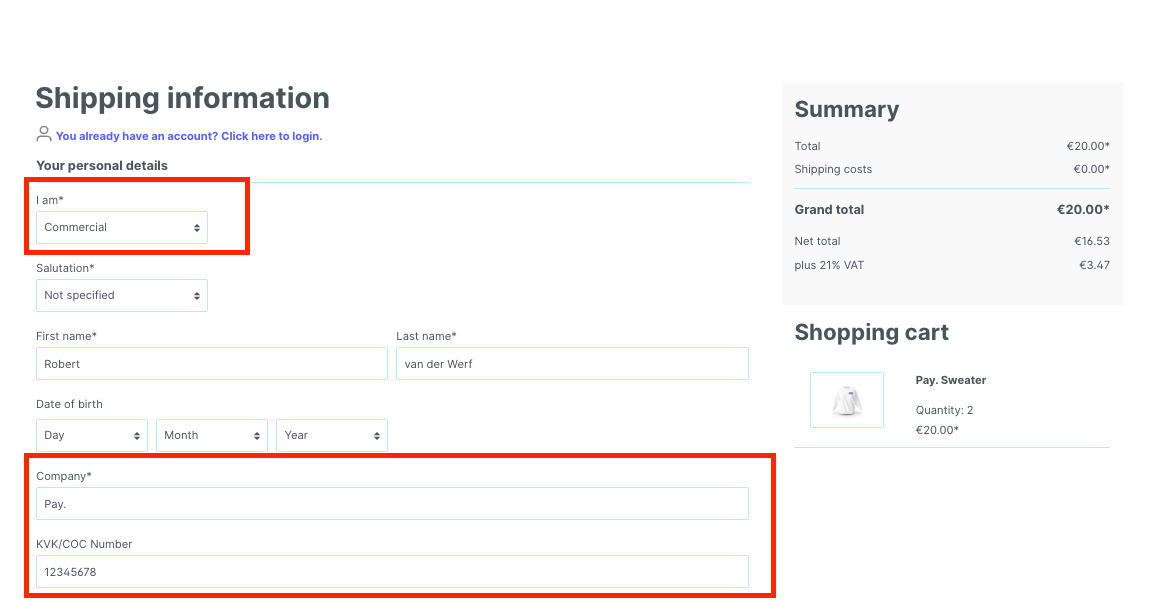
Not seeing this option? Activate this option via Settings > Shop > Login / Registration and activate the option Show selection between company and customer account
- Allow payment change after checkout: indicates whether this payment method should be available after a payment is cancelled or denied. For example, you might not want to show Buy Now Pay Later methods and/or credit card options, if the customer was denied by a payment option already.

Additional customer fields
Here we explain how you can set additional fields in the customer registration form. You can make certain fields mandatory, which can be useful for processing your orders and customer data.
- In the Shopware 6 Admin panel, go to Settings > Shop > Login / Registration
- Here you can set the fields you would like to use on the Customer Registration page
- Click on Save to save your settings
Example
Translations
You can manage the payment method name, description and translations yourself in Shopware.
- Go to Settings > Shop > Payment method > Edit details of the relevant payment method. You can update:
- Title: name as shown in checkout
- Description: additional information that is shown in the checkout for this payment method
- To change the translations, simply switch between languages at the top right (next to the cancel button)
Multicore
To limit the impact of a Single Point of Failure (SPOF), we make it possible to use multiple cores in our Magento2 plugin. We will explain how here:
- In your Shopware6 admin panel, go to:
Settings > Extensions > Pay. payments
or
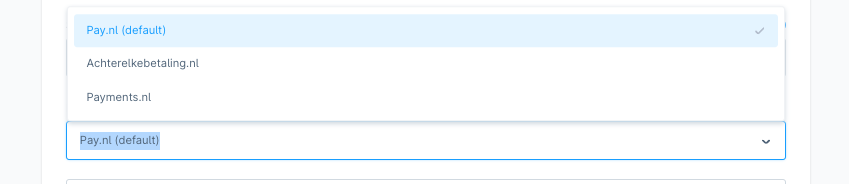
Extensions > **My Extensions > ... **(next to Pay. payments) > Configure - Under Advanced Settings you will see a dropdown next to Failover gateway. Choose between:
- Pay.nl (Default) - this is the GMS API (rest-api.pay.nl) and is selected by default
- Achterelkebetaling.nl - this is a TGU and can be used when the GMS is unavailable
- Payments.nl - this is a TGU and can be used when the GMS is unavailable
- Custom - set your own URL, in the same format as the example
NB: the alternative cores can be used for starting transactions and retrieving their status only. - Click Save to save your changes
Look out for this setting:
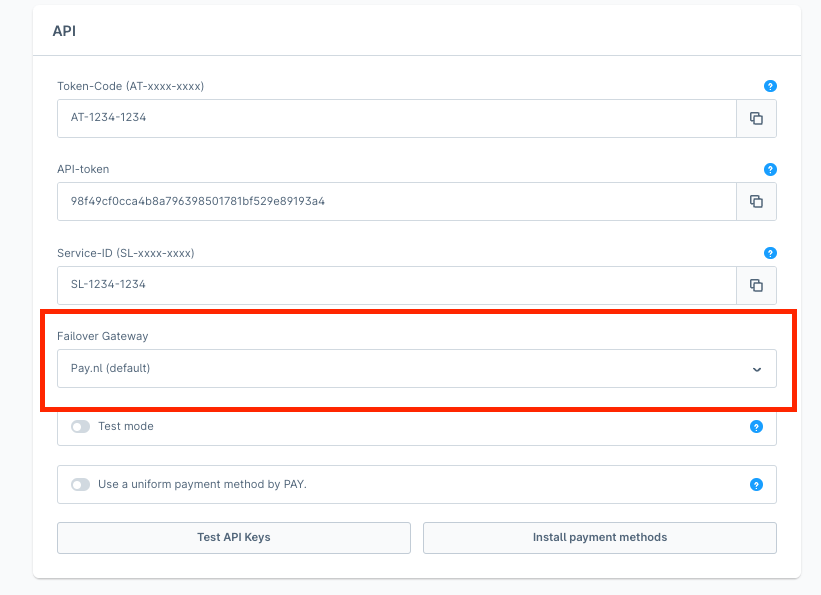
Simply select an option from the dropdown menu:
The idea behind the multicore is that your transaction processing is never interrupted. The multicore is, therefor, available for the endpoints transaction::start and transaction::info/status only. Non-essential processes (like the getService, refunds etc.) can continue once any disruptions have cleared.
Returnless
As of version 1.6.9 we support Shopware's native refund API which is used by partners such as Returnless.
When you have installed both Returnless and Pay's extension. You can create a refund automatically after creating a return by going to:
- Go to Returnless portal
- Create Credit Invoice (or Refund) and select "Mark as done"
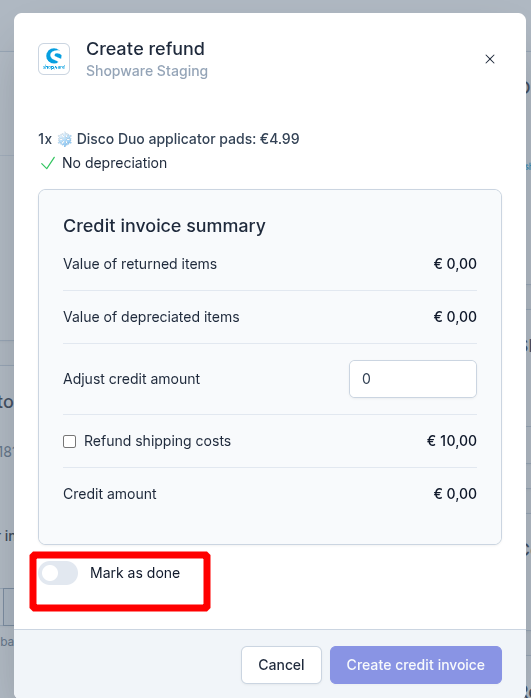
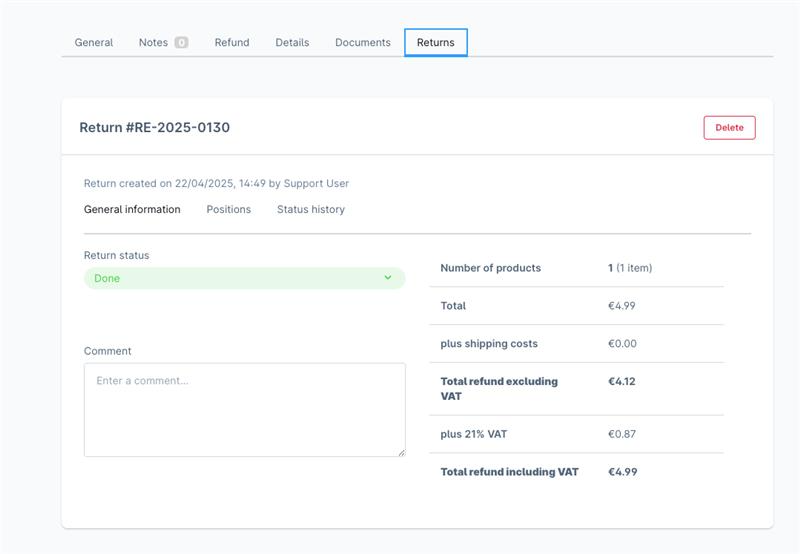
- If you do not select Mark as done in the step above, you can manually adjust the refund status by going to the Shopware admin > Orders (open the relevant order) > Returns > change return status from In Progress to Done
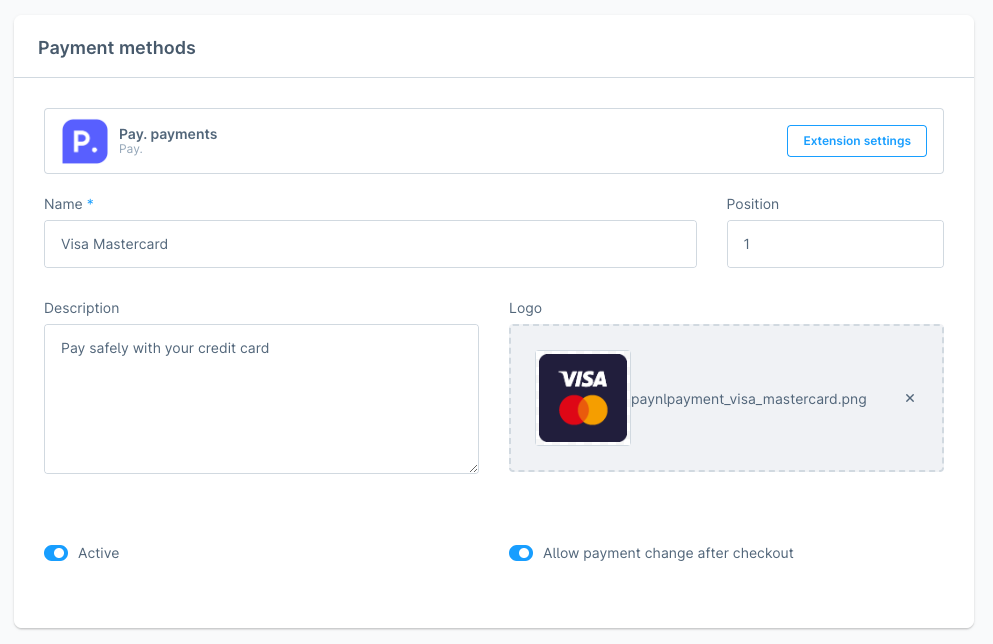
Payment method settings
It is possible to change a few settings via Settings > Shop > Payment method .
- Name: name as shown in checkout
- Position: to determine the ranking in checkout. Enter -100 (for example) to show this payment method at the top of your list. The smaller the number, the high up in the ranking they will appear.
- Description: description as shown in the tooltip. You can include instructions here, for example for bank transfer.
- Logo: change the logo as shown in the checkout.
- Active: indicates whether the payment method is available in the checkout.
- Allow payment change after checkout: indicates whether this payment method should be available after a payment is cancelled or denied. For example, you might not want to show Buy Now Pay Later methods and/or credit card options, if the customer was denied by a payment option already.
Updated 5 months ago