
Cloud Connect
If the merchant has active terminals connected to their service, you can show a list to select the terminal. If there is only 1 terminal the selection field is not needed. You can use the redirect flow to save loading the integration or use the statusURL and a POS integration to build a seamless flow.
Instore can generate Card Present Transaction on a terminal.
Enabling Cloud Connect in the PAY.POS
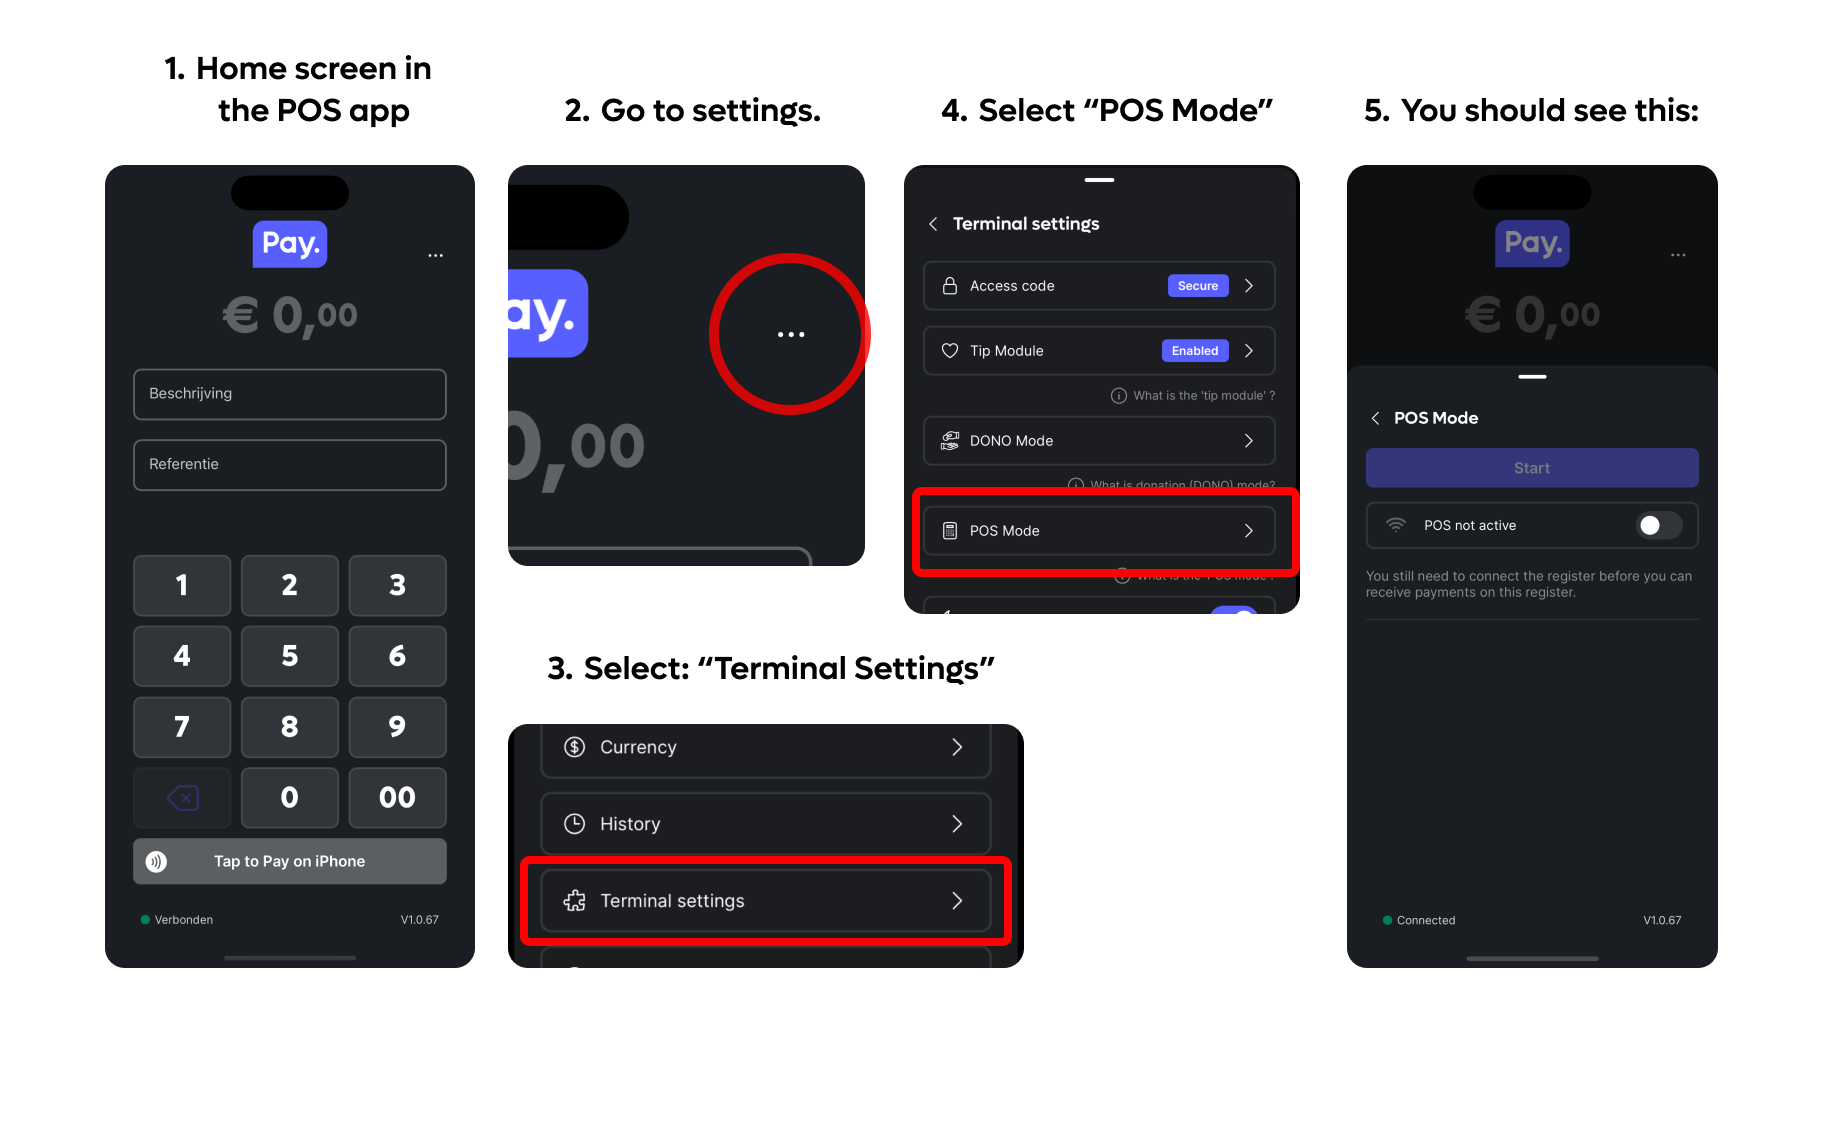
Once you are on the POS Mode screen in settings. Toggle the POS switch, this will connect your device (if you have internet connected) to our digital register system.
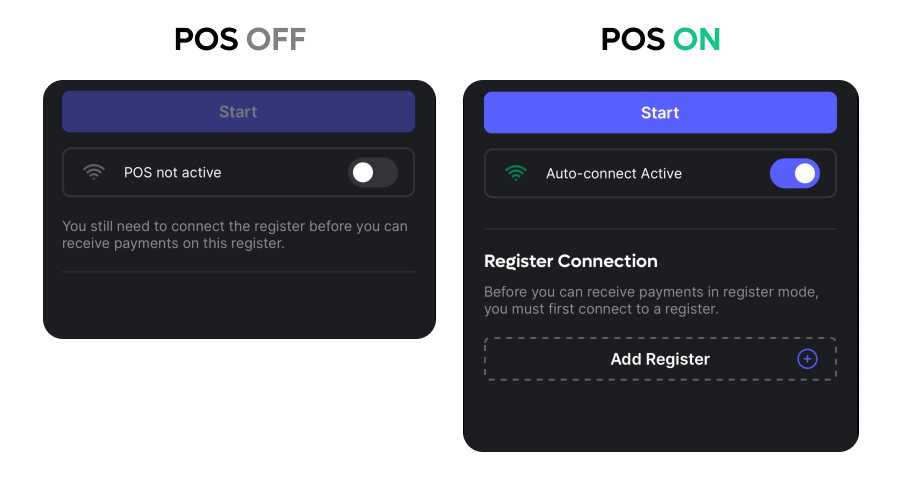
If the internet icon is turned green this means you are successfully connected to our digital register system and you are now ready to create your first connection to this payment terminal!
Creating a register to perform payments
Tap the "Add Register" section and give it a name, we'll call it Register 1 for now:
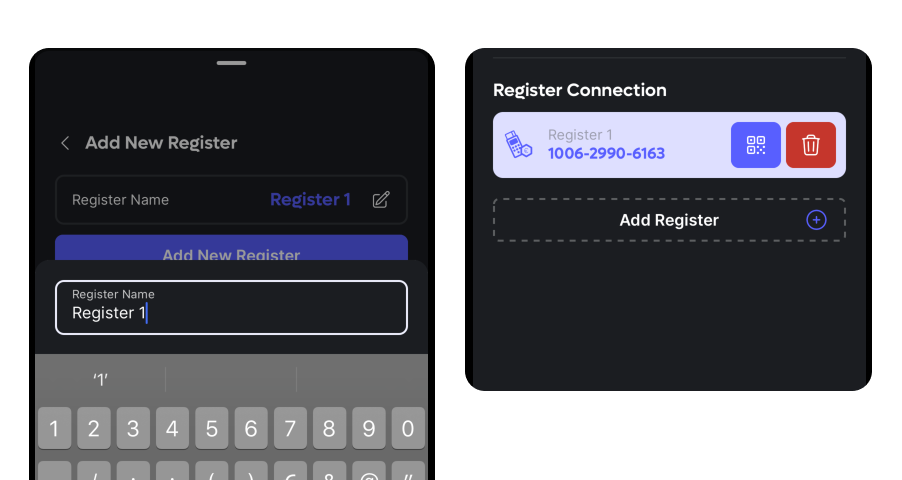
After you've added the register you should see it back on the POS page. You are now ready to send payments to this device.
se (at least) the following payload in the Order:Create API.
{
  "serviceId": "SL-1234-1234",
   "amount": {
    "value": 2350
  },
  "description": "POS transaction",
  "reference": "REF1234",
  "paymentMethod": {
    "id": 1927,
    "input": {
       "terminalCode": "TH-1234-1234" //use Service:GetConfig or Terminals:Browse to get a list of terminals linked to your SL
    }
  }
}
A step by step walkthrough can be found in this recipe
Once you get a response, you can show our hosted payment page for interaction with your employee or with the payer. Or use our status API with our JS components.
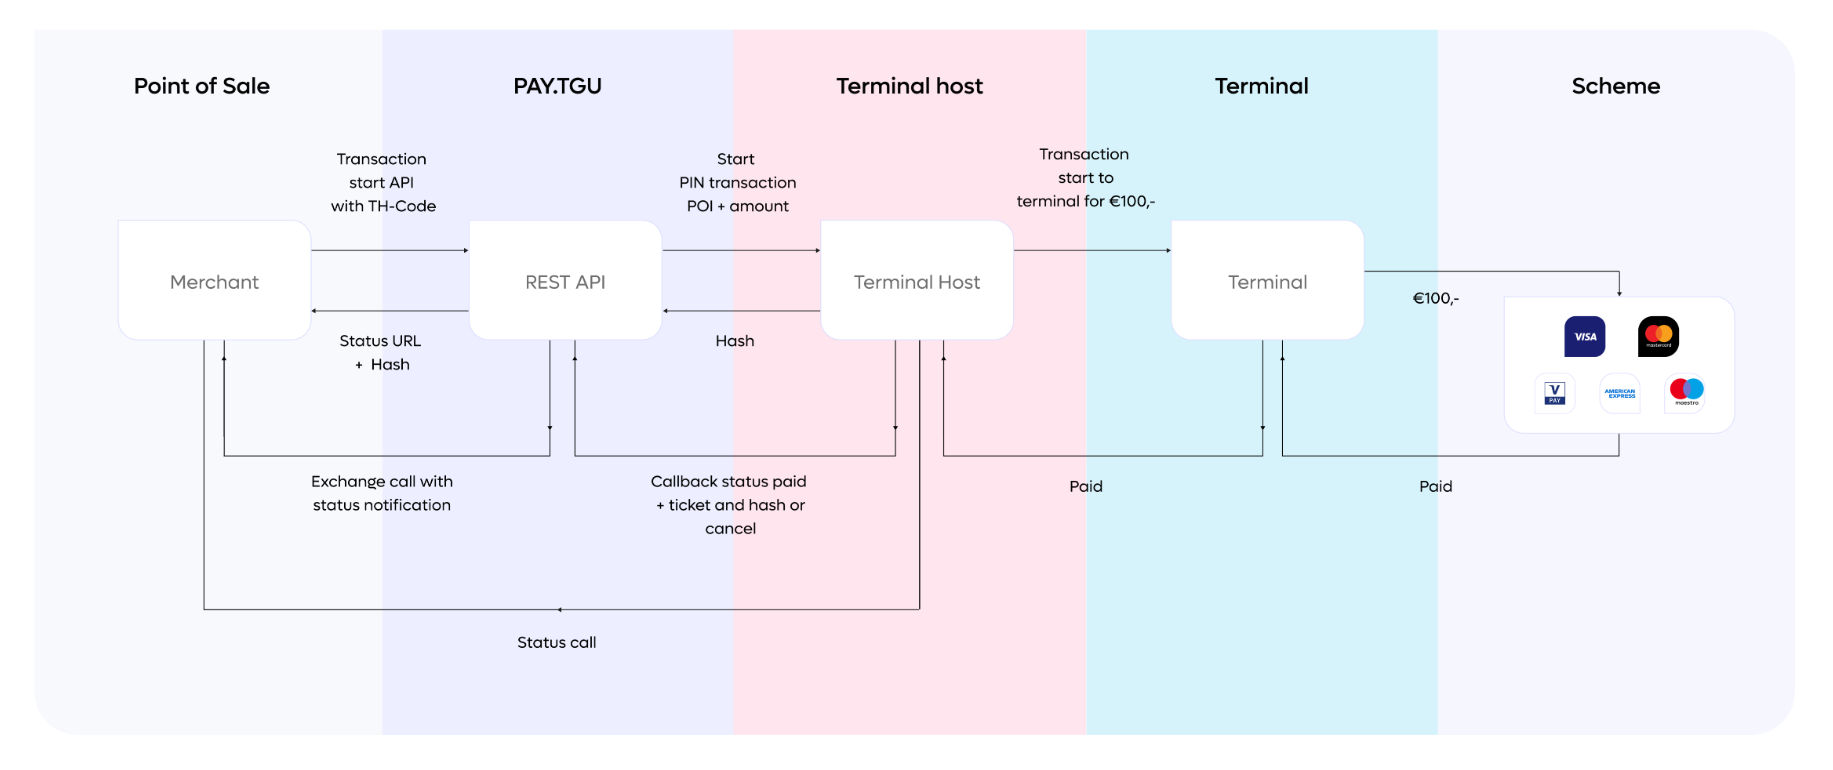
You can fetch the status of the instore payment via the Order:Status API. This prevents a lot of HTTP calls. We use long polling with a maximum timeout of 5000 ms. If the transaction is paid in that timeframe, we return the data instantly.
Starting a payment
After you've completed the setup above let's now create an order using the register we've added to our account! To start we are gonna follow the Order:Create API. You'll need the following important pieces of information for now.
| Info | Description | Where to find: |
|---|---|---|
| terminalCode | The code generated on your specific device that allows you to receive payments. | In the POS Mode screen in your SoftPos app that we've setup previously in this guide. |
{
  "serviceId": "SL-1234-1234",
   "amount": {
    "value": 2350
  },
  "description": "POS transaction",
  "reference": "REF1234",
  "paymentMethod": {
    "id": 1927,
    "input": {
       "terminalCode": "TH-1234-1234" //use Service:GetConfig or Terminals:Browse to get a list of terminals linked to your SL
    }
  }
}
A step by step walkthrough of the payload OR extensive instructions can be found here In person payments-cloud
After you've hit the Order:create endpoint you should see a response with a few links. These can be vital to your specific use-case.
  "links": {
    "status": "<status_url>",
    "abort": "<abort_url>",
    "approve": "<approve_url>",
    "decline": "decline_url>",
    "void": "<void_url>",
    "capture": "<capture_url>",
    "captureAmount": "<captureAmount_url>",
    "captureProducts": "<captureProducts_url>",
    "debug": "<debug_url>",
    "checkout": "<checkout_url>",
    "redirect": "<redirect_url>"
  }